Photo Corner Border- Tutorial


I've had several people ask me about how to do the border with the photo corners so here goes.
Start with the photo corner punch and a 12 x 12 piece of cardstock (figure 1)
Starting at the bottom left corner, line the punch face up and punch the first piece. (figure 2)
Line the side of the punch along the edge of the first punched piece. (figure 3)
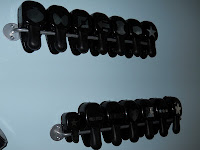
Continue punching, making sure to line up the punch along the edge of the previous punch until the whole side is punched. (figure 4)
If you'd like a border strip, cut at 2.75 (figure 5)
You can also add a contrasting accent. (figure 6)


Comments