Posts

Showing posts from August, 2011

Build a Bear.....not just for the kids

Image
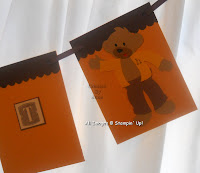
When I first got my Build a Bear die for my Big Shot (exclusive through Stampin' Up!), I thought that I was going to have fun making cards for my daughter, my scouts and all the other little girls in my life. Then they started getting 'too old for Build a Bear'. So then I was wondering what to do with the die. Then it dawned on me..... Why does it have to be used as a little kid card? So I made a cheerleader and a jock complete with letter jacket. Then I used those as ends on a banner for a class reunion that I was a vendor at. After that, I started using the bears instead of people images on cards. After all, they can say thank you as easily as Happy Bearthday (Birthday). Then I got this new stamp set, Not So Seriously. It's in the new catalog. I love it. It's sassy, snarky, and little bit twisted but oh, so much fun. So then I made the bear instead of the human lady....and here's how it turned out. The background paper is from the Paisley Petals DSP. Pa

Interlocking Gate Fold Card- Free Tutorial

Image
I'm really enjoying this new card technique. I saw a card months ago that was an owl in a tree on Dawn Olchefsk's blog. I then took the idea and went with it and now love the idea of an interlocking card with a gate fold. Here's the full finished card, unopened so you can see the final look. To make this card you just need to use your Big Shot and the Scallop Oval frame Bigz die. I cut the 2 pieces in 2 different colors so that I can stamp in the center. You don't have to use Very Vanilla or Whisper white. You can use anything you want. Here's the card partially open so you can see how it works. After stamping my base, I scored it and folded the gate fold. Then I stamped my center piece and attached Dimensionals on one 1/2 of the oval, lined it up on one side of the gate and adhered it. Here's the oval and the opened card so you can see what I mean. After the oval is attached. I then add dimensionals to one half of the scallop frame. I c

Little Cards, Big Ideas

Image
Have you ever just wanted a little card? I've been using these cute 3x3's. They're perfect for most occasions. Just tuck a little one into a gift bag, add it to the bouquet of flowers, tuck a note into your child's lunch, your sweetie's pocket, or include with your orders (no matter whether you are a Stampin' Up! demonstrator, a demo from another company, or just in a customer service oriented business). A little note goes a long way. Cut your paper into 6 x 3 pieces. A sheet of 12 x 12 cardstock will make 8 bases. Remember to use a good quality cardstock like Stampin' Up! A strong foundation holds up better. Yes, some people will look at it and throw it away. Others will keep it until it falls apart. Wouldn't you want them to hold up if the recipient decides to keep it forever? So back to the cards. I made these cute little flowers using that ring from the Blossom Bouquet Triple Layer Punch. I have tons of those things because I just LOV

Flowers anyone?

Image
I saw these really cute Gerbera daisies made with the Daisy #2 Sizzix die we have. The tutorial I saw was a little more intense than I wanted. So I changed it up a bit. I didn't put stems on them and pop them into vases but I did put glitter on the center brad and made them into really cute magnets. I took the flowers I was sponging along with a finished magnet to a friend's house to work on. Her husband thought it was a real flower. I love when I can make paper flowers that look real. Maybe I will have to add stems and put some into vases. I would love to have a beautiful bouquet of flowers that last and last. Some of these are really fun looking and some look realistic. I'll be offering them at my craft fairs and on my Etsy in September. They'll make great teacher gifts too. The link to the tutorial for these I found on youtube. http://www.youtube.com/watch?v=Od8TZE9nil8